The Neelin's travels and adventures
  • HOME
  • Blog
  • REMINISCING
    • Part I - 2000-2002
    • Part II - 2002
    • Part III - 2003 - 2004
  • Time Line
  • PHOTOS
  • HASHING
    • My Hashing
    • Hash Photos
    • Hash Photos
    • Hash Photos
    • Hash Photos
    • Hash Trash
    • Trail Maps
    • InterHash Photos
    • CoMo X - 15 to 17 May 2015
    • CoMo XIII - 18 > 20 May 2018
    • CoMo XIV - 17 - 19 May 2019
  • CONTACT
  • EXPERIMENTS
    • GARDENING EXPERIMENT
    • MicroGreen Experiment
    • 1st EXPERIMENT
    • 2nd Experiment
  • Around London England - 20 July 2014
  • Around London July & August 2014
  • Around London England - 21 July 2014
  • WEATHER
    • FEBRUARY 2018
    • 2015 - Weather
    • December 2014
    • November 2014
  • Renovations

Day 4 - Radishes - 2nd try.

30/9/2019

0 Comments

 
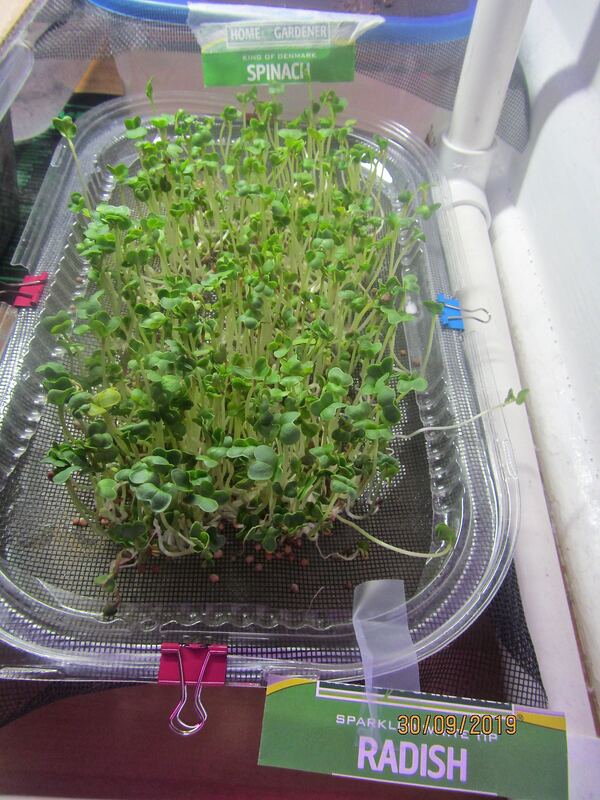
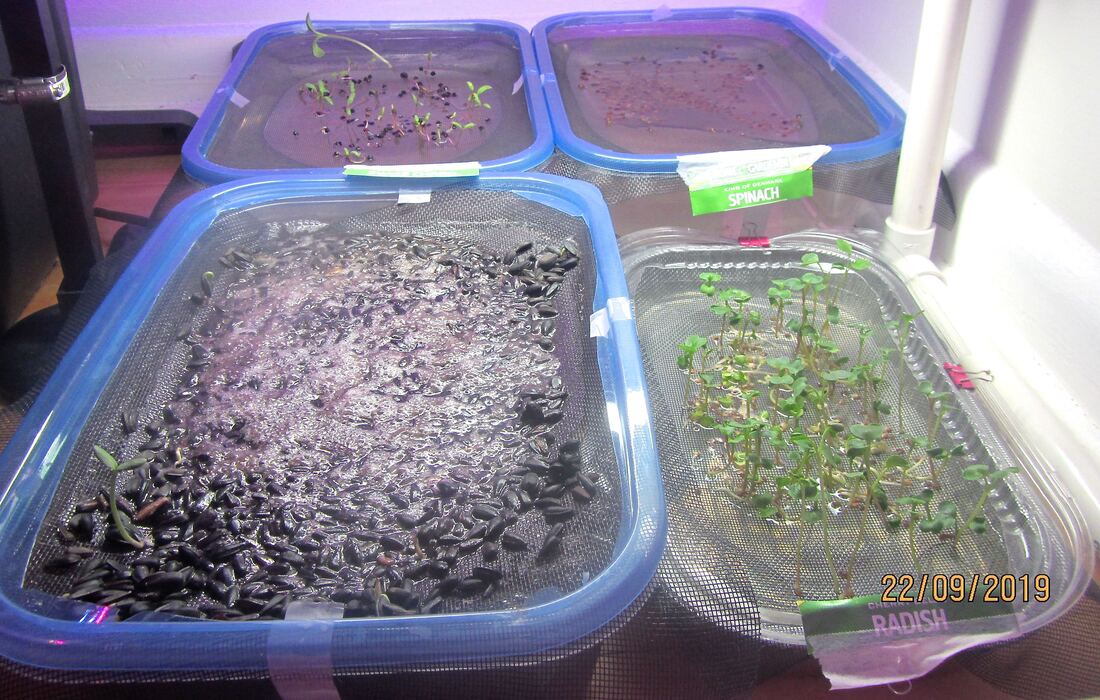
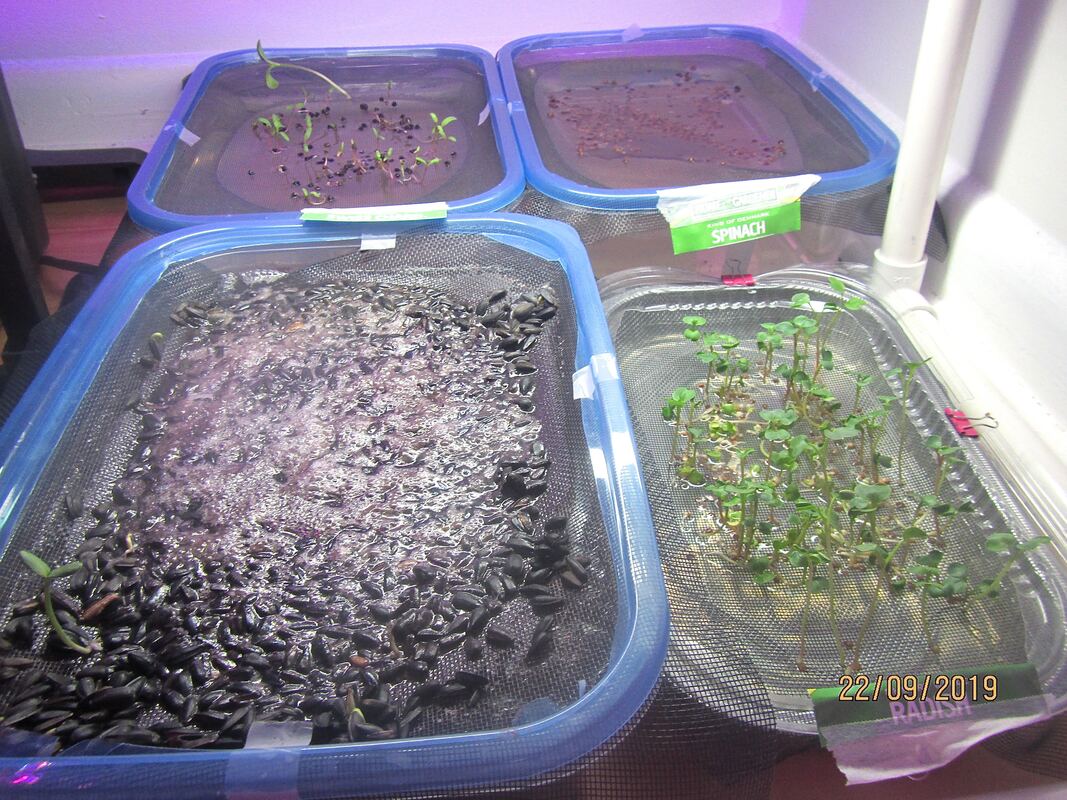
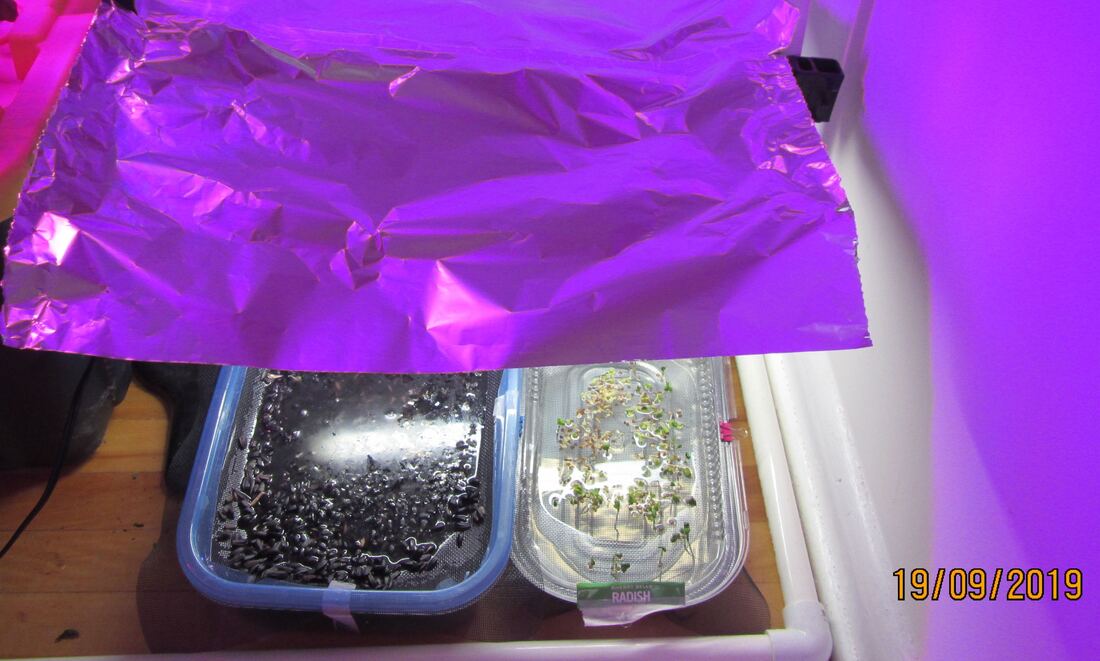
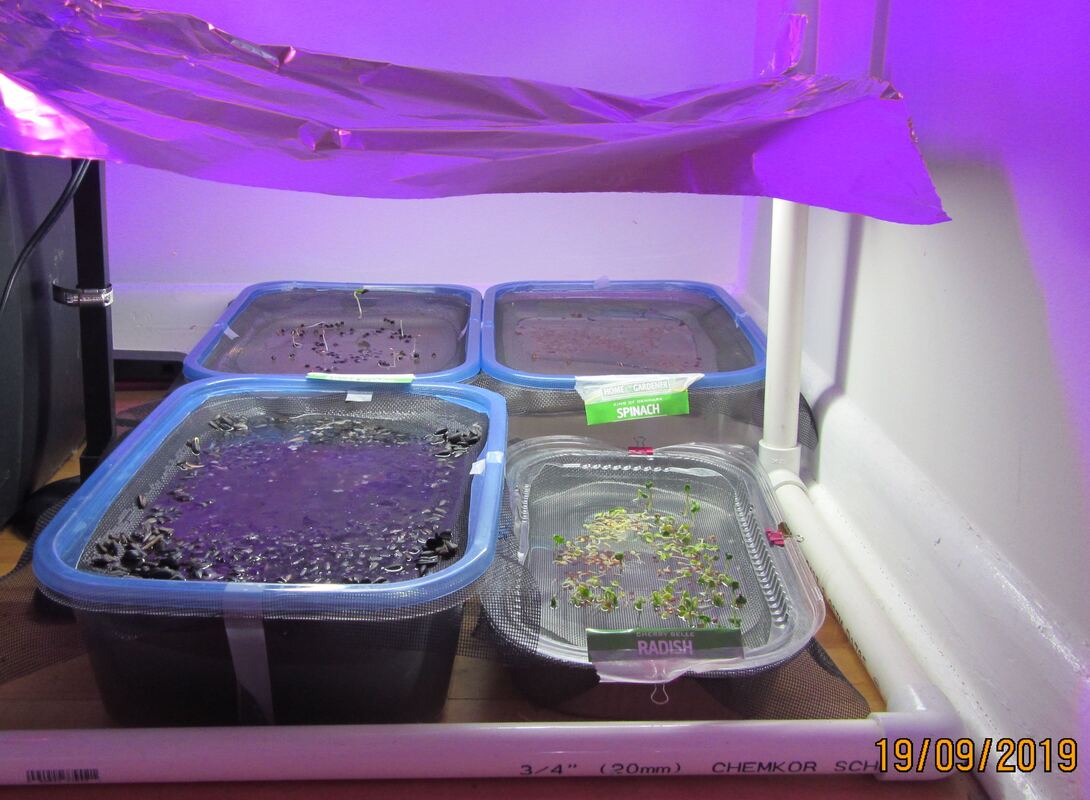
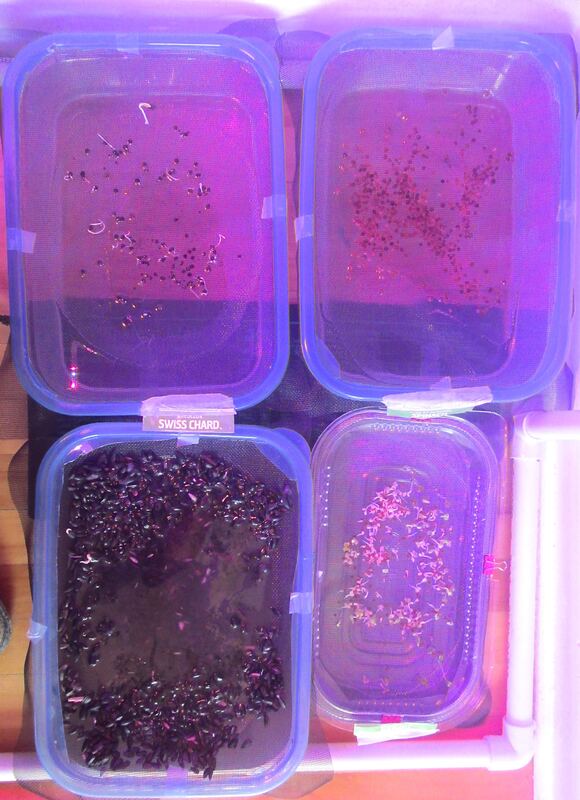
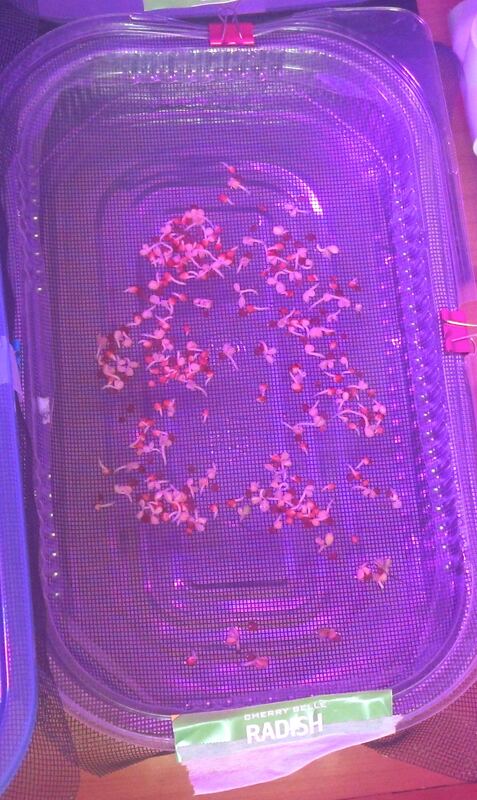
Took the cover off of the Sparkling White Tip radishes and they are doing very well.  Much better than the first try.  I planted more seeds and you can see that the crop is much denser than the first try.
It seems as if this is a quick and easy to grow micro greens indoors with very little effort.  The biggest problem may be to be able to get bulk seeds over the winter.  Single packs of seeds would not seem to make much economical sense unless you can get them at half price at the end of the season.  May just have to make another buying trip to Home Hardware and get all that they have.
Later in the week I may just get rid of the other crops that have not done well and try something else.
Picture
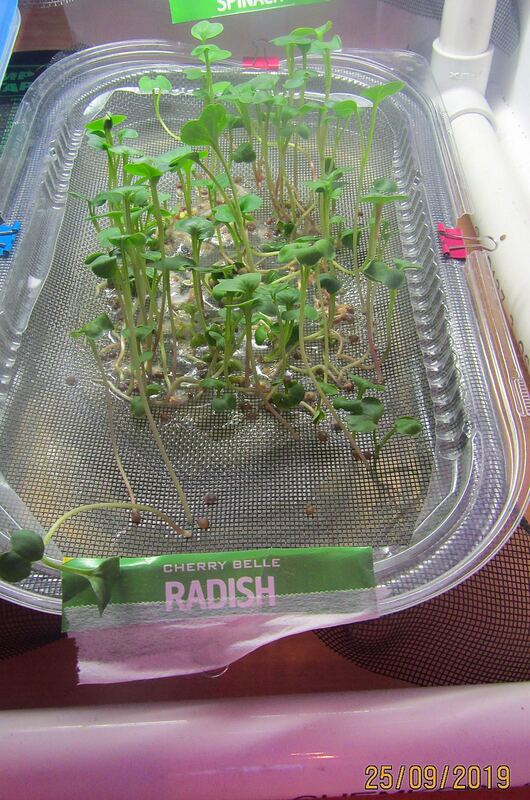
Day 4 after removing cover.
0 Comments

Day One for the New Sunflowers

28/9/2019

0 Comments

 
I let the sunflower seeds soak for about 24 hours and spread them over the shredded paper.  Then put a thin, single, layer of shredded paper over them and covered to keep them in the dark for three days.
Not associated with this experiment but also planted some old basil seeds for the hydroponic setup.
0 Comments

Something New

27/9/2019

0 Comments

 
I gave up on the sunflowers and threw them out in the garden.  There were only 3 or 4 sprouts and the rest seemed to be quite water logged so that was the end of that.  I am going to try something new and I have not seen on the net.  I am going to try the next lot of sunflowers in shredded newspaper soaked with the hydroponic solution.  
I already had some shredded newspaper so put that in the cleaned out original container and soaked it with the solution.  I spread a little dry shredding over the top to try and get the surface more or less even.  If the paper is still dry tomorrow I will wet it again.
Put some sunfl0wer seeds in a measuring cup to soak for about 24 hours.  Will spread them on the newspaper tomorrow.
The Swiss Chard and Spinach are coming along but I may get rid of the spinach and retry it later.
I am pretty sure the reason the three others did not work out as well is because the seeds got water logged due to the screen sinking a little into the water.
Picture
Shredded newspaper for the next sunflower experiment.
0 Comments

September 26th, 2019

26/9/2019

0 Comments

 
The radishes that were planted were, Cherry Belle.  From the videos I saw days 10 to 12 should be harvest days for radish.  Therefore, I was going to harvest the radishes yesterday but time seemed to run out.  Went to Old Farts for lunch and then to the OLT to see a play in the evening.  I did take the photos for day 10 though and they are below.
It was a simple process of simply cutting the sprouts at just above the level of the screen with a pair of scissors.  I tasted one and it had a very distinctive radish taste but a little milder than the root.  Because these are grown on a screen over water I am sure that, unlike seeds grown in soil or coir, the roots can also be harvested.  In fact I did get some roots as well as the stems and leaves.
After cutting I strained the water put the screen back on but ensured that it was tighter than this experiment, spread two packages of Sparklers White Tip Radish, replaced the water and topped up with some more hydroponic solution.  The two packages of seeds covered much more of the area than the single package from the first attempt.  Covered over and will leave covered for three days and see how these work out.
I bought eight packages of seeds from Home Hardware at 49¢ a pack (1/2 price) because it is the end of the season.  Also these are a different type.


As you can see from the photo the other seeds do not seem to be doing well.  I am thinking of trying the sunflower in shredded paper with the hydroponic water solution.  I have lots of sunflower seeds so that is not a problem.  Still wondering just what to do about any other seeds.  Because it is the end of the growing season getting seeds is a little more difficult but I have seen where I can order bulk seeds on line so that is an option.  I will also go through the seeds I have on hand from previous years and give them a try.
Picture
Day 10 - 25 September 2019
Picture
Day 10 - 25 September 2019 - The day before harvesting.
0 Comments

DAY 7 - 22 September 2019

23/9/2019

0 Comments

 
Day 7 of the experiment was yesterday but the only thing I did was take a couple of photos.  The radish is growing quite well and the Swill Chard is coming along.  Not so sure about the Spinach and now I am pretty sure the Sunflowers are done in.
I will have to get better containers if I am going to keep doing this.  Not only that but will have to get bulk seed as well.  The single seed packs do not have enough seeds and the cost do make it worth while.
The radish should be ready on day 10, or at least that is what I have seen in the videos.  Will have to do a bit better co-ordinating timings to get things to come pickable at the same time.  In some of the videos they have 3 or 4 different crops all growing together but that seems odd because of the difference in the harvesting times.
No matter it is just a bit of fun and hopefully things will work out and the effort will be worth while.
Picture
Day 7 - 22 September 2019
Picture
Day 7 - 22 September 2019
0 Comments

DAY 4 CONTINUED

19/9/2019

0 Comments

 
Later Thursday afternoon - I set up another grow light for the greens.  I put two pieces of tinfoil with the shinny side down over the bulb to reflect and hopefully diffuse the rays more evenly over the containers.
Picture
With grow light installed. Tinfoil over the top to help diffuse the rays more evenly.
Picture
With grow light installed. This light does not seem to emit as much red and blue light.
0 Comments

Thursday, 19 September 2019 - Day 4

19/9/2019

0 Comments

 
Thursday - Day Four.  I planted the seeds on Sunday afternoon.  I took off the cover and now the seeds are exposed to the grow light that is over the hydroponics.  I will have to get another grow light (one in the garage) and set it up over the experiment.  I don’t believe that the existing light is going to give sufficient coverage.
As you can see in the photo the radish seems to be coming along as well as the Swiss Chard has sprouts as well.  The sunflowers and spinach may take a few more days under the light before they come to life.
I am afraid that I may have drowned the sunflowers as they seem to be quite ‘deep’ in the water.

​As this is the first time I have tried this I am learning as I go along.  Hopefully it will work and the sprouts will get eaten.  They are supposed to be good on sandwiches, as a garnish and in smoothies. 

Not part of the experiment but I took two cuttings from an Impatiens plant and put them in hydroponic rock wool cubes along with some hydroponic solution to see if they will sprout roots and we will have impatiens in the house over the winter.  Possibly if these do sprout I will do a couple more cuttings.
Picture
Day 4 - Thursday - 19 September 2019
Picture
Day 4 - Thursday - 19 September 2019
0 Comments

This should be DAY TWO....

17/9/2019

0 Comments

 
Seeing as how I started the project, first day of planting, on Sunday the 15th of September today, 17th of September should actually be day two of the experiment.

Tuesday - TWO days after planting for the experiment.

​ I am not sure how things are going to work out.  I originally thought that there was to much water in the containers but when I checked today the screen has slipped.  The rim did not hold the screen tight enough.  If i try this again using the same containers I will get the screen tight and then tape it down so that it does not slip with the weight of the seeds - especially the sunflower.


I see that the radish has already sprouted.  Radish is one of the fastest growing vegetables so that was to be expected.
Picture
2 days after planting.
Picture
Radish - 2 days after planting
0 Comments

Days 1 and 2

15/9/2019

0 Comments

 
In yesterdays blog I mentioned that I was going to try a Microgreen growing experiment.  Well, the seeds are sitting in water waiting to germinate so here is what I have done on the first two days.

I am going to combine days 1 and 2 of this experiment into just this one post. 

Day One!
​The main reason for not having Day 1 as a separate post is that I simply went to Dollarama and bought three 6 litre containers and then Home Hardware to see what few seeds they had left and to get a roll of window screen.

After doing some research on the net I found that the three most profitable crops were; sunflower, peas and radish.  These were followed by broccoli and cress.  With a little more searching more crops appear. 
Unfortunately I was limited to what was available at this time so I had a few radish seeds left over from this year and sunflowers from the bag of bird seed.  I am trying Spinach and Swiss Chard.  Well both of those are used as salad greens.  I then cut out the centres of the containers leaving just the rim which will help keep the window screen in place.
I put all four seed varieties into water for soaking.
That is it for day One…


Day Two!
A little more work done on day 2.
  • Cut the window screen to more or less size.  Left overhang around all edges
  • Used 3 containers from $ama and one tinfoil tray that had been used for something else.
  • Fitted the screen to the containers and put on rim.  Found that the rim did not keep a tight seal.  May have to get better containers (more $).  Simply used scotch tape on all four sides to keep the rim tight and the screen more or less taut.
  • Placed the four containers beside the existing hydroponic set-up and filled with water and the hydroponics fertilizer.  In the videos that I saw I didn’t see any mention of using a solution but only water.  If I had more seeds I would have used one set with just water and one with the solution.
  • Spread the seeds on top of the screen and found that the water may have been to deep.  In the video it seemed as if the water just barely covered the seeds.  I removed some of the excess water and put it in the hydroponics tote.  In the videos, no matter what growing medium was used, the entire surface was covered with seeds.  Unfortunately, there were only enough sunflower seeds to do an entire cover so I just spread the other seeds.
  • Covered to keep in the dark for three days.
All in all it was a very simple operation.  The hardest part was cutting out the tops of the containers but once that is done they will be done forever.  No doubt the window screen will not be reusable so it is a good thing I got a roll for the same price as it would have been to get just enough to cover the containers.
If this works out I will have to check Richie’s Feed and Seed to see if they have any seeds and in what quantity.  The little seed packages are not enough.  I will also do some checking from seed houses on line.  Mainly the ones I have used in the past.  It is not that I am going into business but the greens can be used in salads and on sandwiches and smoothies.
Time will tell: A - how this worked out and; B - will the greens be used!

In the photos the 'odd' colour with the hydroponic set-up is due to the LED grow lights.


​
0 Comments

    Author

    Write something about yourself. No need to be fancy, just an overview.

    Archives

    October 2019
    September 2019

    Categories

    All

    RSS Feed

Powered by Create your own unique website with customizable templates.